| |
| |
Build of Testors Lincoln Mint 1932 Ford Roadster, kit no. 7121 |
| |
| |
| |
10/20/14 |
|| |
|
| |
|
I worked on the model Saturday and Sunday night, after yard work and plumbing work. I think I got a lot done, and once again I found that concentrating so hard on the little parts was very relaxing, almost zen like. Tuning everything else out and concentrating on the task at hand was very liberating.
I blackwashed the chrome parts and engine block. After that dried I started gluing parts up then concentrated on the wiring. I knew early on that putting some effort into detailing the engine and wiring would add a lot to the appearance of the engine. A little detailing here would go a long way.
I probably spent 6-8 hours on the model this weekend. Here's what I got done...
|
| |
|
|
| |
|
|
| |
|
|
| |
|
|
| |
|
I mixed a little bit of black acrylic paint with water, about 1 brushfull of black to 9 parts water. I read online that adding a drop of dishsoap to the water would cut surface tension and let the wash flow easier. I'm not sure if it helped, but it did make a lot of bubles when I dragged the brush over small details. The bubbles burst when they dried and didn't affect anything as far as I could tell. The wash is very thin. I'm using my 79 cent mixing palette from Michaels craft store. I used a 40% off coupon so it was like 40 cents. Score! |
| |
|
|
| |
|
|
| |
|
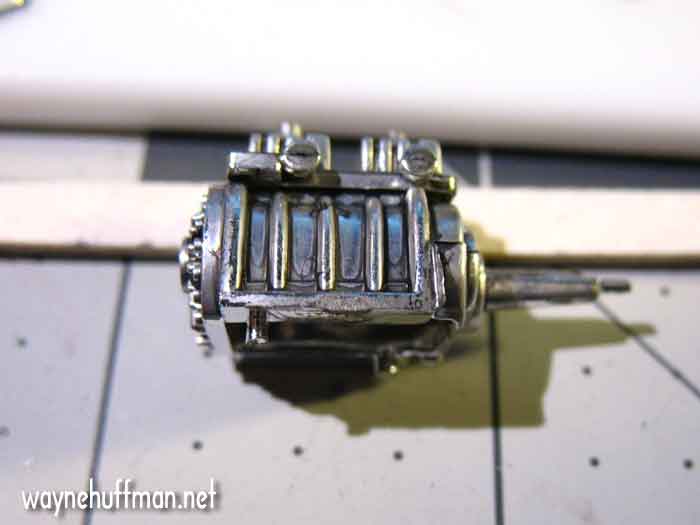
Before blackwashing. I think this is the blower mechanism. |
| |
|
|
| |
|
 |
| |
|
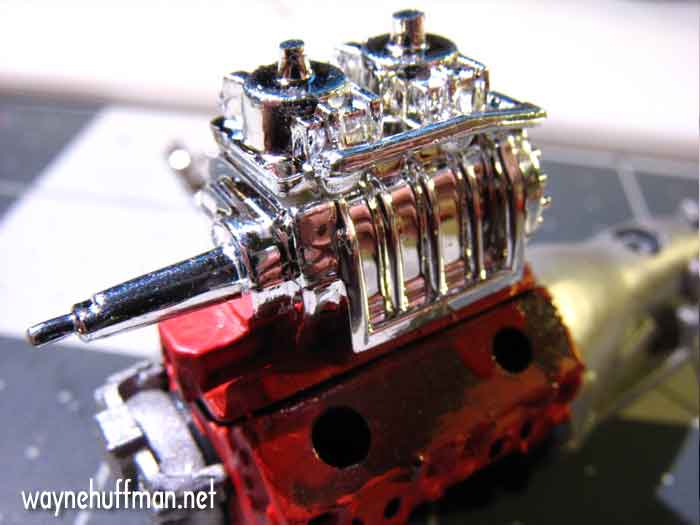
After the blackwash. What a difference! You can see some variations in the black color, I may have mixed it a little thick, probably a thinner wash but doing a couple coats would be more even. But when viewed with the naked eye it looks very subtle and realistic. At this small scale reflections and shadows don't behave as our eye tells us it should. So accentuating the shadows and knocking down the reflections makes it look more real and "in scale" to our eye. It's subtle but quite noticeable. |
| |
|
|
| |
|
 |
| |
|
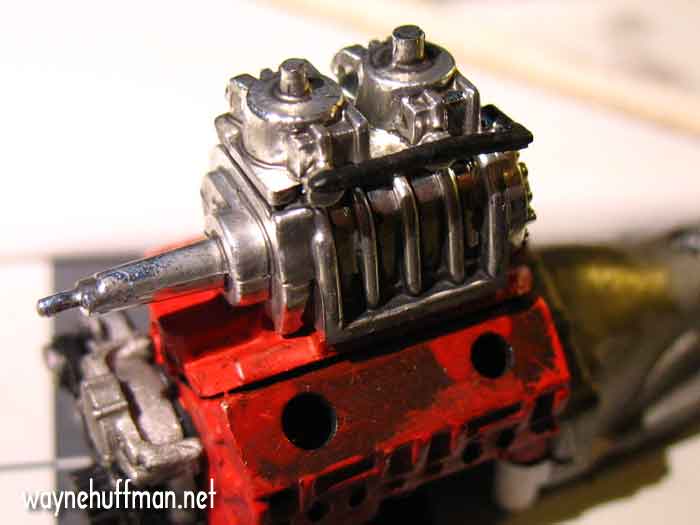
Dry fitting the assembly before the blackwash.... |
| |
|
|
| |
|
 |
| |
|
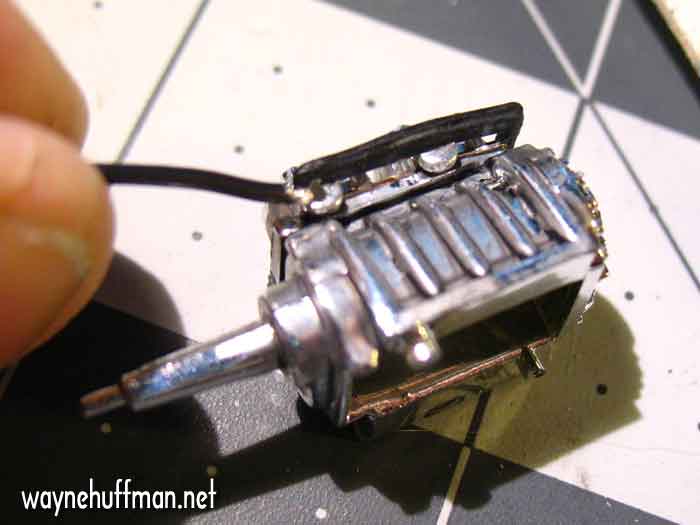
And after... I painted the fuel rail black to add a little detail. This seems like a good place to add some more detail. How is the fuel getting to the carburetors? On a real car there would be a fuel line from the gas tank to the carbs. |
| |
|
|
| |
|
 |
| |
|
So here's my fuel line. I drilled a very small hole in the side of the carburetor assembly using my pinvise. A pinvise is like an Xacto knive handle only it holds tiny modelling drill bits. They're cheap and have a lot of uses. After I drilled the hole I superglued a piece of fine black wire into the hole. I'll just hide the other end of the wire under the firewall after the engine is installed and I thkink it will look pretty good. |
| |
|
|
| |
|
 |
| |
|
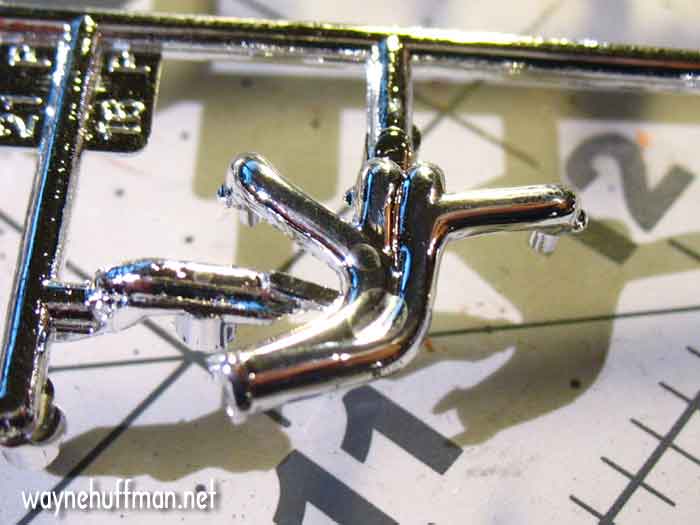
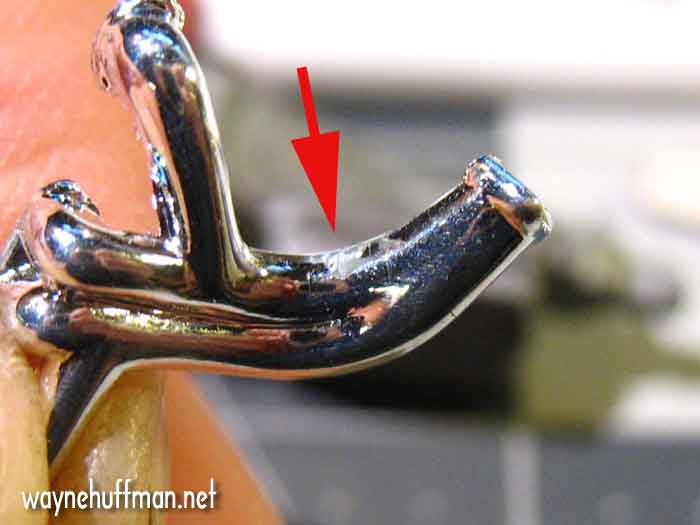
While some of the pieces were drying I decided to separate the exhaust headers from the sprues. Look at this fantastic engineering work. When the parts are cut off the sprues the bare plastic that is revealed by the cuts will be at the top and back of the header, the parts that will be most noticeable to the eye. Genius! Not to mention the fact the cut will have to be on a curve. |
| |
|
|
| |
|
 |
| |
|
Here's the plastic that is exposed by cutting the part off the tree. Some Model Master Chrome paint will hide it a little, but there will still be a noticeable flaw there. How about making the sprue attachment point at the end of the header where it would be hidden by joining the rest of the exhaust pipe to it? |
| |
|
|
| |
|
 |
| |
|
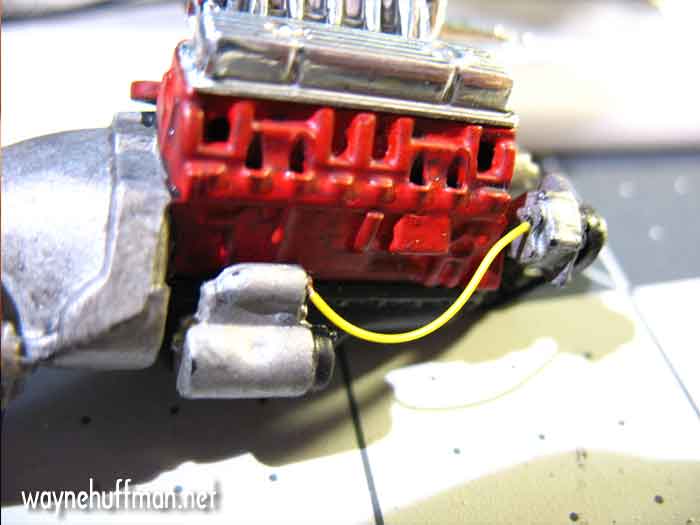
I superglued some of the chrome pieces to the engine block and also glued the other end of the starter wire into the back of the alternator. It's starting to look like an engine now. |
| |
|
|
| |
|
 |
| |
|
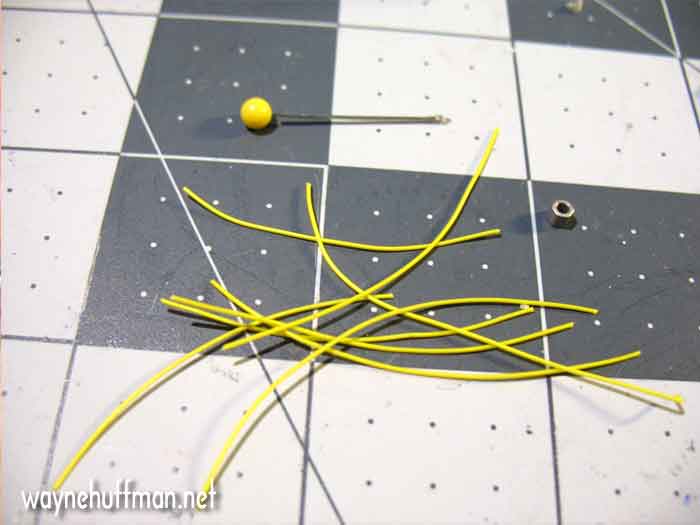
What else to detail? The kit comes with a set of rubbery black "spark plug wires" molded with a very crude distributor complete with a big empty hole in the top. I thought black would be a little dull so I decided to make some of my own. More of the thin yellow wire I used on the starter. It's about 28 gauge so it's thin but has a little stiffness to it. You can see from the pin the size of it. I needed to remake the distributor as well, I thought this metal jewelry bead that looked like a nut would be good, but it was too small. |
| |
|
|
| |
|
 |
| |
|
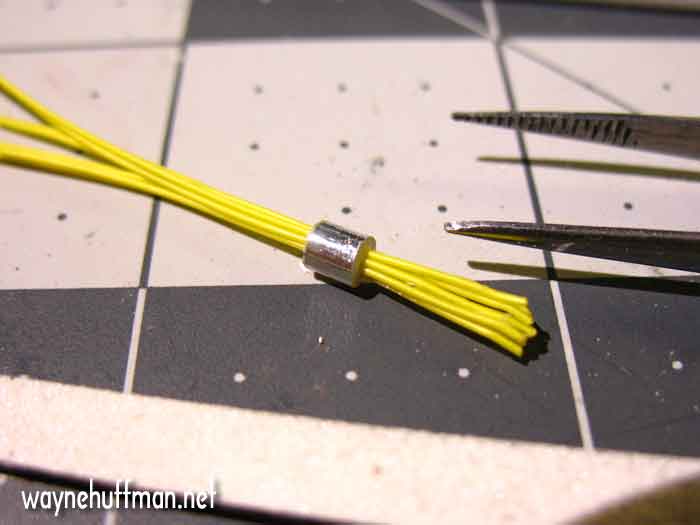
I cut a piece of sprue from the chrome parts tree, approximately the same size as the rubber distributor from the kit. I used the pinvise again and drilled a hole in the center big enough to hold all 8 wires. It's not very detailed but it's hidden behind the intake up against the firewall so I don't think it will really be seen. |
| |
|
|
| |
|
 |
| |
|
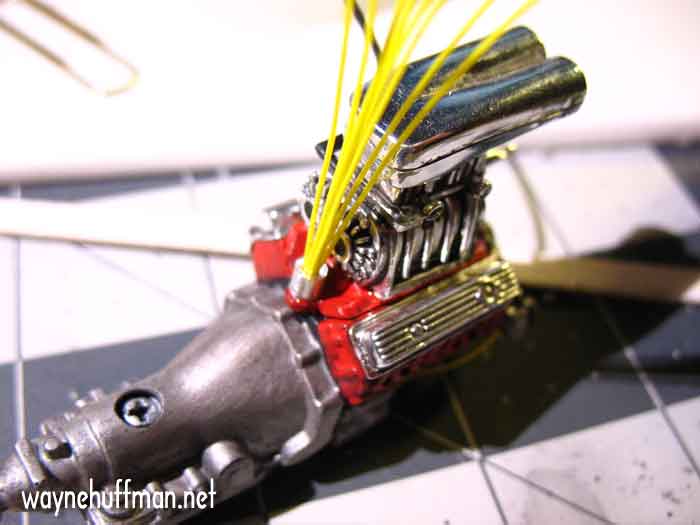
Here it is superglued in place. I lined up the ends of the wire inside the chromed piece and dropped some superglue in to hold them. The wires are much longer than they need to be, I'll cut them to size as I glue them into their respective holes. But first... |
| |
|
|
| |
|
 |
| |
|
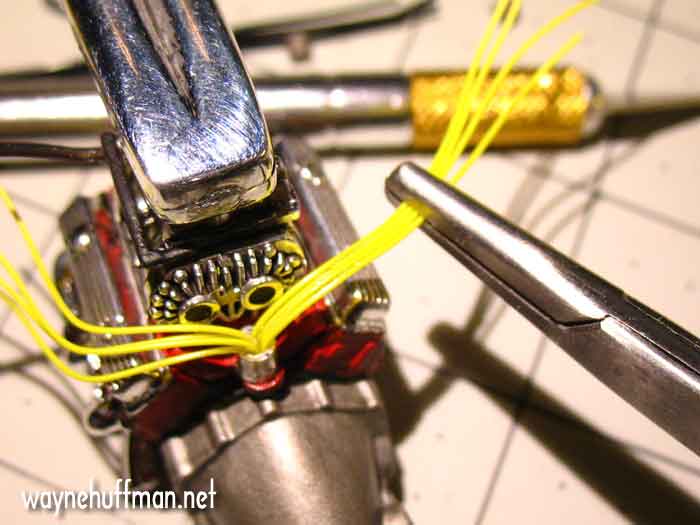
A bit of problem solving. I HATE scale spark plug wires that are all spread out and messy. On a real car you have small plastic clips that hold the wires neat and tidy. That's what I wanted to do here, but the clips would have to be impossibly tiny. So I pinched 4 of the wires into my locking tweezers (a medical "needle driver" I got off Ebay for $3) and spread superglue on the wire bundle. |
| |
|
|
| |
|
 |
| |
|
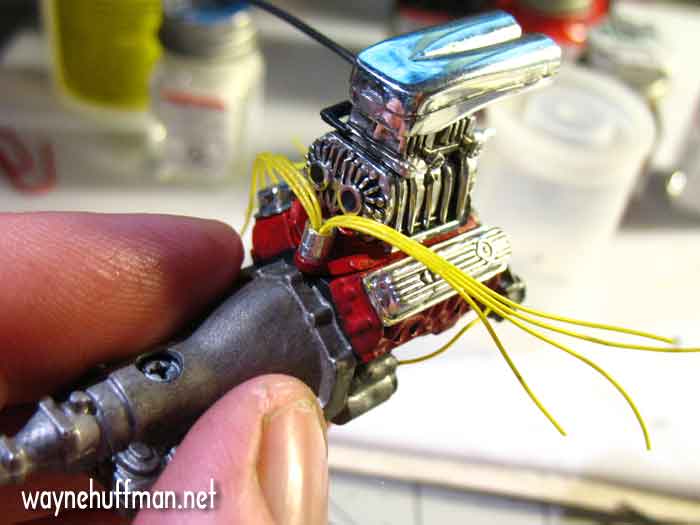
The superglue holds the wires together, but the whole assembly remained flexible. Now I can insert the wires into their holes and have them be nice and neat. I test fit them but didn't like the look of the wires just disappearing into the holes. I want to replicate the spark plug boots that would be at the end of the wires. And just look at the detail on the back of the blower assembly that now stands out thanks to the blackwash! |
| |
|
|
| |
|
 |
| |
|
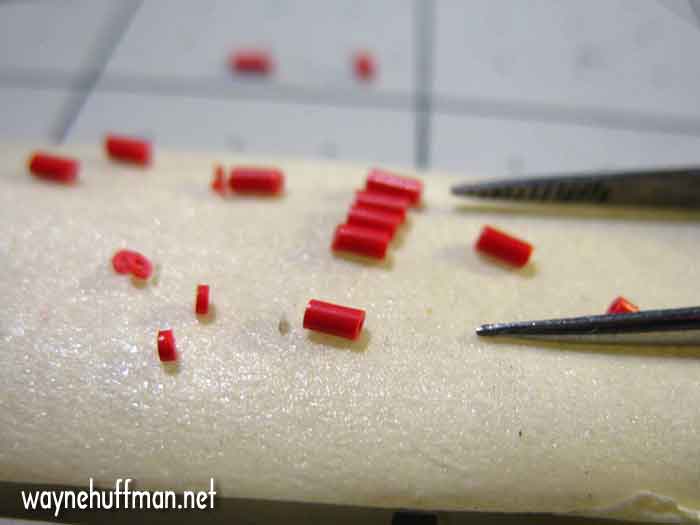
I found some more fine red wire, bigger than the yellow plug wires. I stripped the insulation off and it just fits over the yellow wire. Looks good! |
| |
|
|
| |
|
 |
| |
|
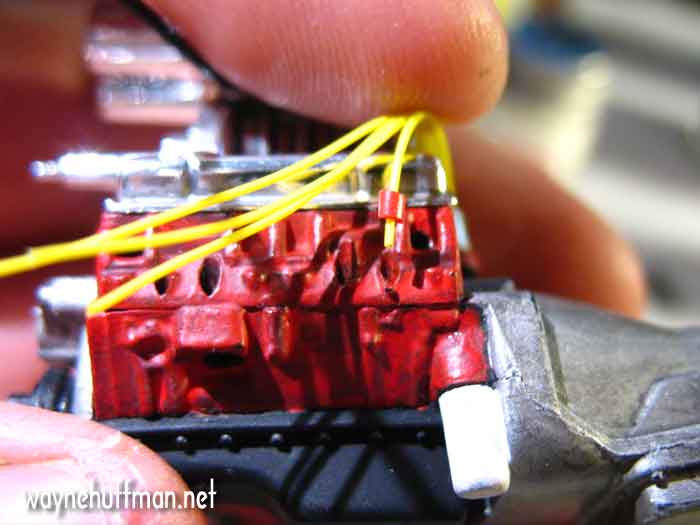
You can see the holes for the plug wires in this shot. I cut the wire to length, push the piece of red wire insulation over the end, add superglue to the hole and push the wire down the hole then slide the boot down till it touches the super glue on the block. Seems to hold firmly enough. You can also see here I painted the oil filter white. I'm trying to decide if I should try to draw a logo on it. |
| |
|
|
| |
|
 |
| |
|
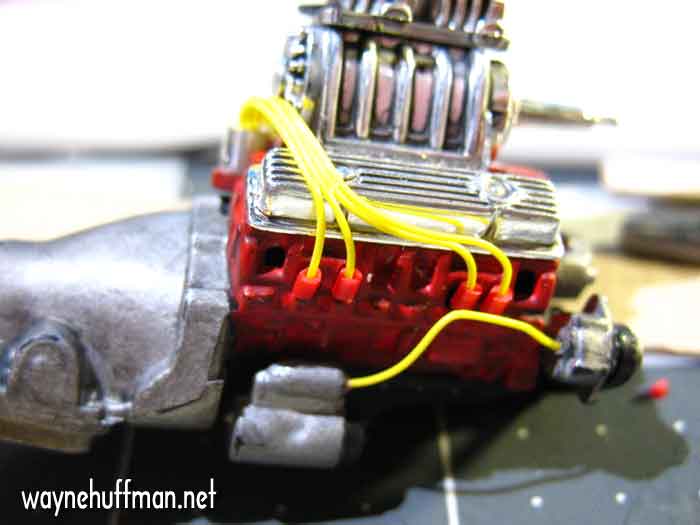
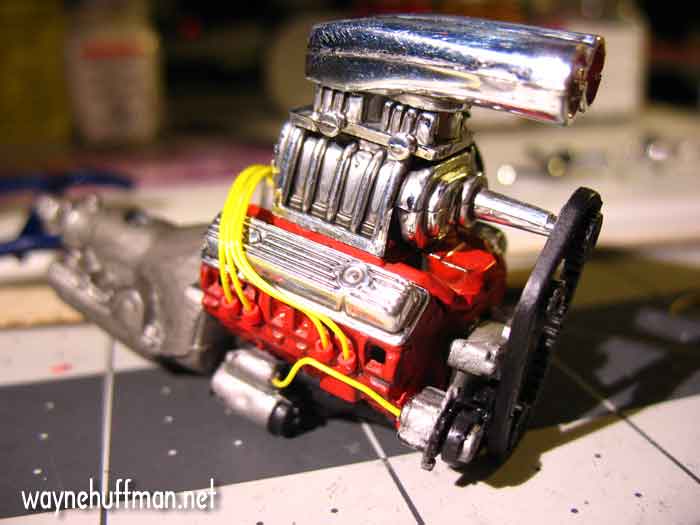
The plug wires and boots in place. I may cut some very thin strips of black electrical tape and glue onto the bundle of wires to imitate the clips holding the wires in place. One note here I was lucky enough that I test fitted one of the headers to the block early and realized I needed to dress the wires close to the valve cover to clear the header when it went on. |
| |
|
|
| |
|
 |
| |
|
The end of my weekend's work. I glued the small pulleys to the front of the engine and dry fitted the awkward molded belt. I am going to replace that piece with something, maybe more thin electrical tape or something like that. But overall I am happy with how the engine looks now and I think it is a huge improvement over the way it would have looked built straight out of the box. |
| |
|
|
| |
|
|
| |
|
|
| |
|
|
| |
|
|
| |
|
Next: Attaching the headers and fitting the engine to the chassis. |
| |
|
|
| |
|
|
| |
|
|
| |
|
|
| |
|
|
| |
|
|
| |
|
 NEWER NEWER |
Beginning of this build |
OLDER |
| |
|
|
|

