| |
| |
Build of Testors Lincoln Mint 1932 Ford Roadster, kit no. 7121 |
| |
| |
| |
02/07/15 |
|| |
|
| |
|
I'm working on the interior now, almost finished with the model.
|
| |
|
|
| |
|
|
| |
|
|
| |
|
|
| |
|
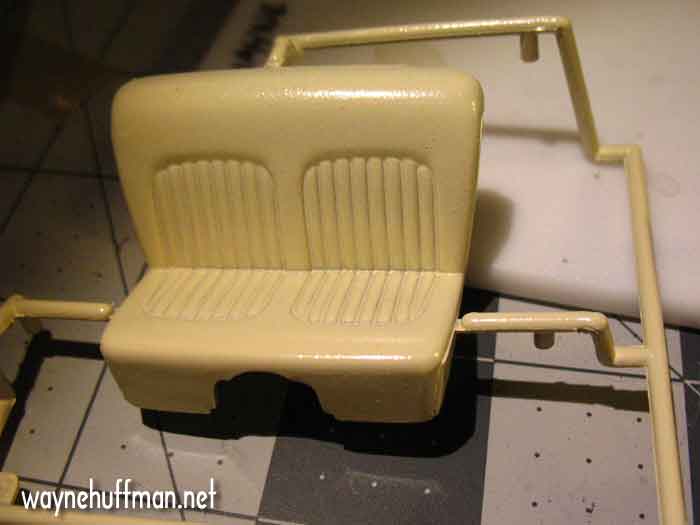
My first step was painting the seats a gloss coat so I could wash them with a little color to weather them. I didn't really like the tan color so I used a spray can of Testors gloss Ivory to spray the interior pieces. I'll spray with dullcote to finish and knock down the gloss. |
| |
|
|
| |
|
|
| |
|
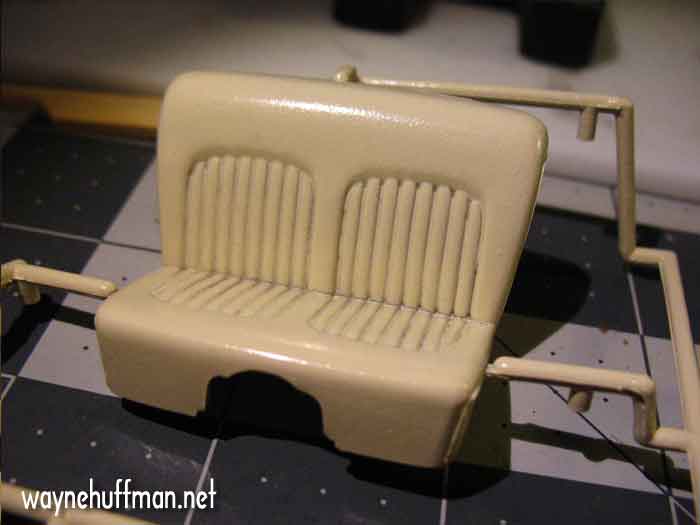
Here's what the seats look like after a wash of dark gray acrylic. It's uneven but to the eye it looks subtle enough to just look a little used. |
| |
|
|
| |
|
 |
| |
|
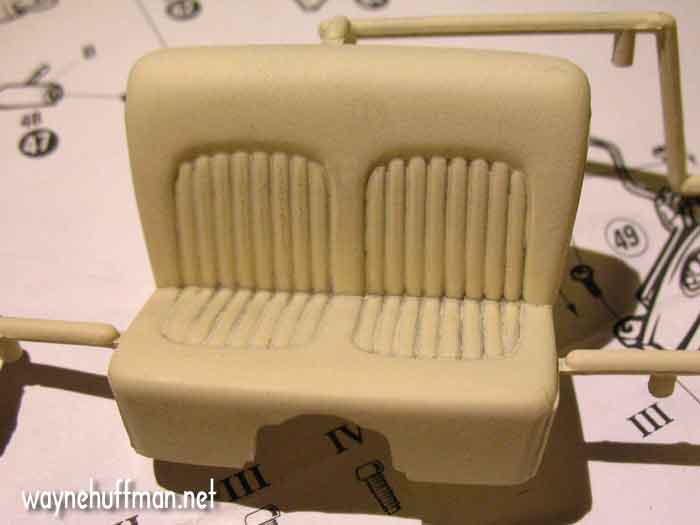
After the last coat of dullcote to give the appearance of cloth. To the eye it looks great! |
| |
|
|
| |
|
|
| |
|
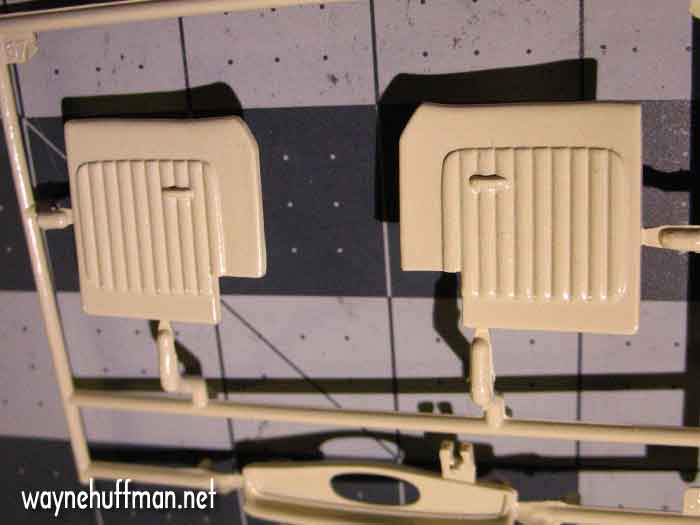
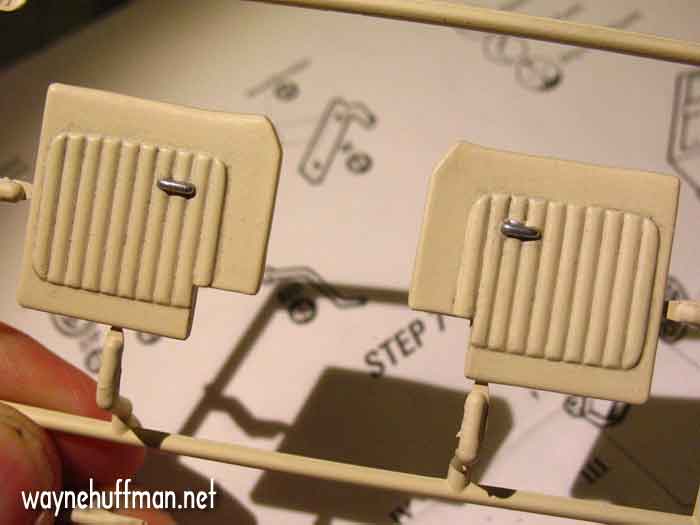
The door panels before and after. I brushed some Testors chrome silver on the door handles. It's too bad the handles were molded in, that's a great opportunity to make a separate chrome piece and it would've really added some interesting detail to the door panels. But they didn't do that, so some paint at least gives a little visual detail. |
| |
|
|
| |
|
 |
| |
|
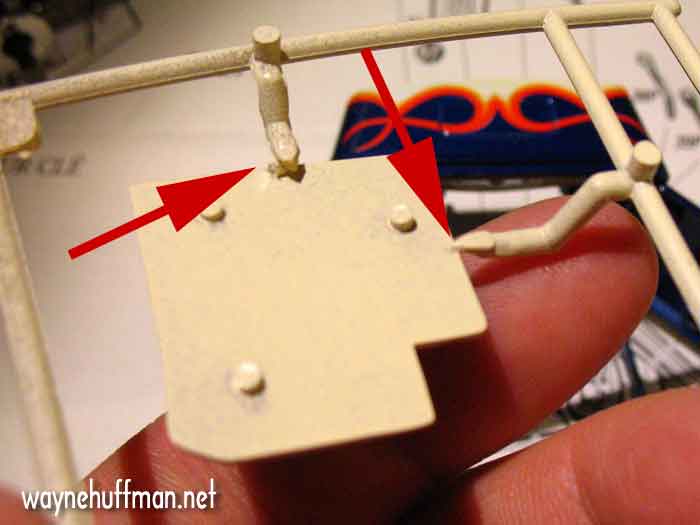
The door panels have this very interesting attachment to the trees. Here of all places attaching at the edge wouldn't have made a difference. But on the back like this it will interfere with the fit into the body. |
| |
|
|
| |
|
 |
| |
|
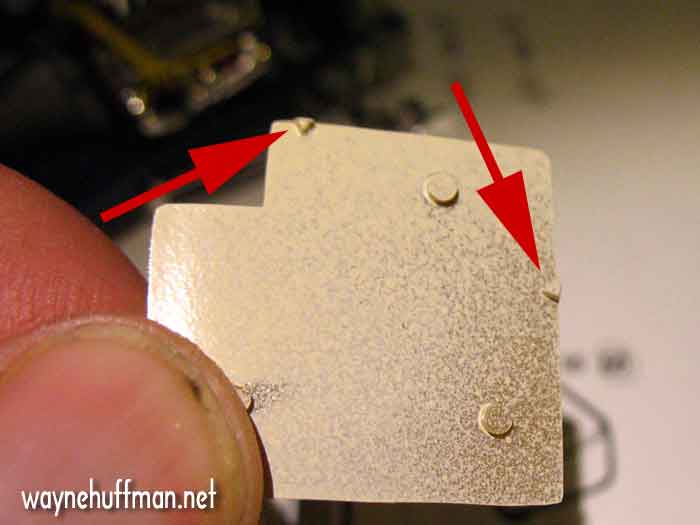
Here's the nubs left over after I cut the panels from the tree. You've got to sand these down flat or the panels won't sit flush with the body. |
| |
|
|
| |
|
 |
| |
|
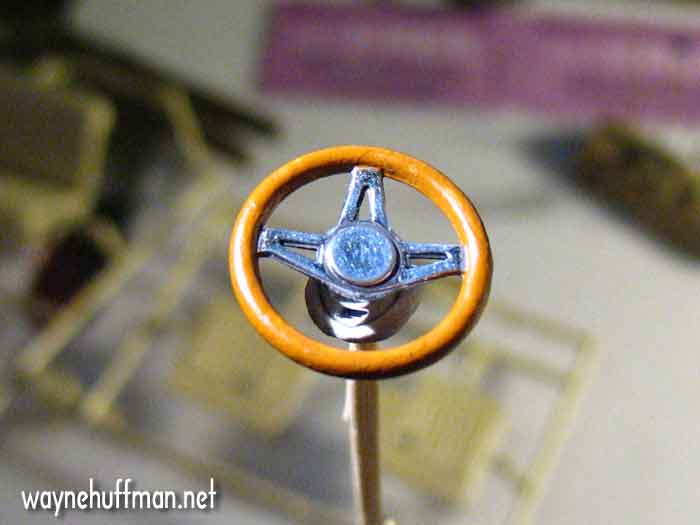
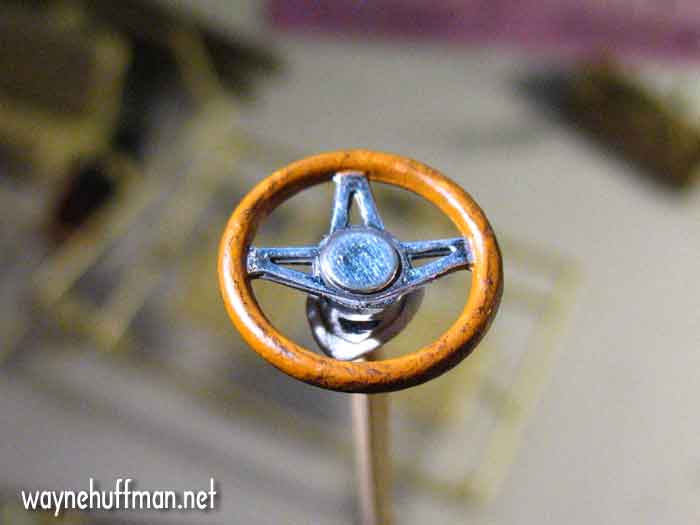
The wheel is molded as a solid chrome piece. The instructions say to paint the rim black but that seemed too plain. My friend Steve Jasik has a friend named Bob Koch who specializes in rejuvenating sports car steering wheels. Most of them are wood so I figured that's what this car would have. After I cleaned up the seams and sprue marks on the wheel with fine sandpaper I painted it flat brown. |
| |
|
|
| |
|
 |
| |
|
I then drybrushed some flat back onto the rim to simulate wood grain. The whell is set into some silly putty on a toothpick to hold it while I paint. It's abotu 5/8" diameter. I also black washed the hub and spokes to bring out some detail. |
| |
|
|
| |
|
 |
| |
|
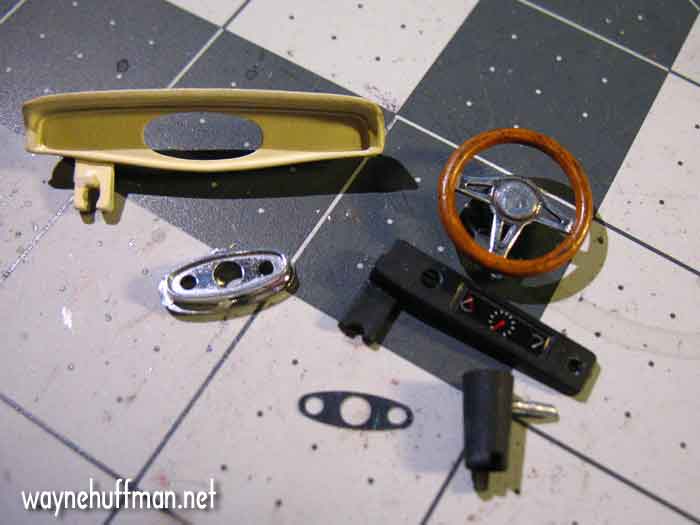
Here are all the dash parts ready to assemble. The steering column is painted flat black with a silver turn signal stalk. The dash has been painted the same Ivory color as the seats and dullcoted. The instrument cluster is a chrome piece with a photo etch piece for the gauge trim. The photo etch piece seems to be unneccesary, it doesn't add anything but it's there so I used it The gauges are a sticker added to the plastic piece that will locate a metal link for the screwy steering mechanism. |
| |
|
|
| |
|
 |
| |
|
 |
| |
|
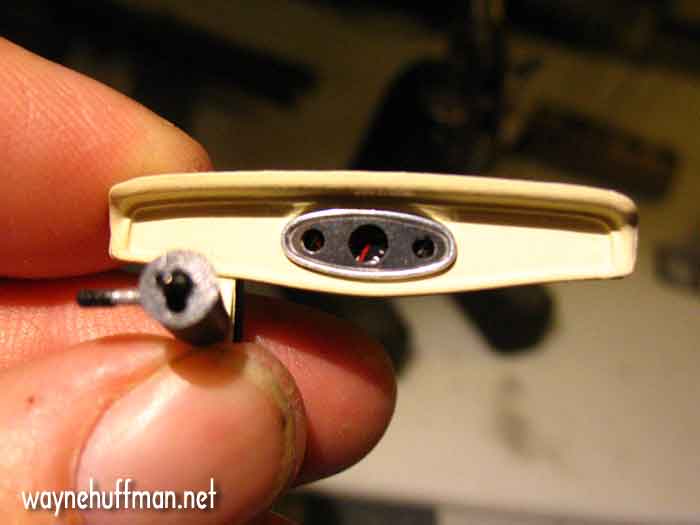
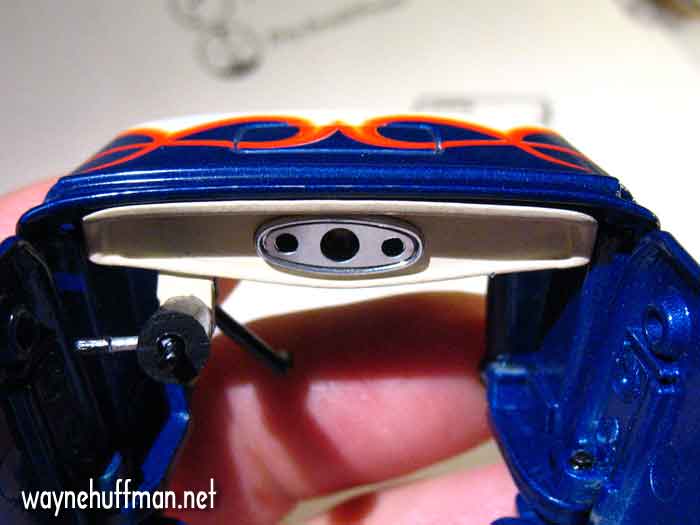
Front and back of the dash. You can barely see the gauges because they are very deep behind the chrome intstrument cluster. The metal piece is the steering linkage. |
| |
|
|
| |
|
 |
| |
|
|
| |
|
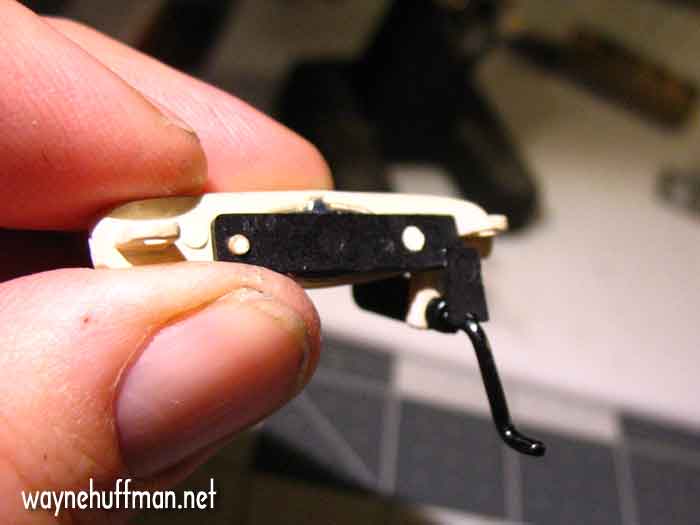
This is how the dash will mount in the body. I'm leaving the steering wheel off for now because I think it will be in the way for the later steps and will be easily broken. The dash mounting arrangement is overly complex, again I think it's because of the steering mechanism. Here's what I ran into. |
| |
|
|
| |
|
 |
| |
|
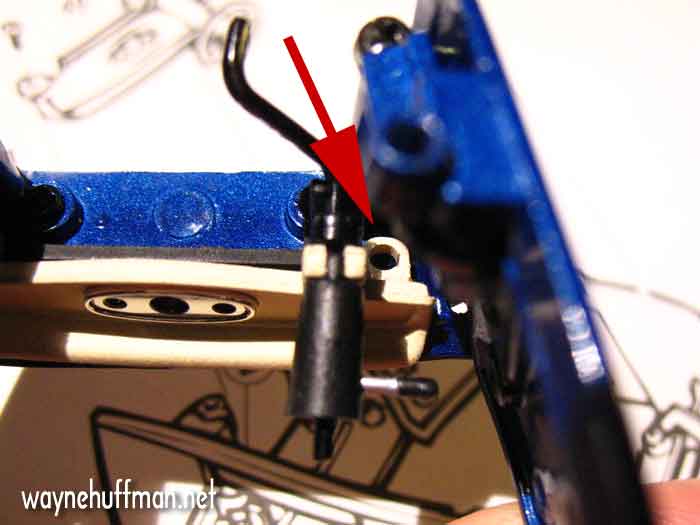
The dash screws into the chassis. I believe they thought glue would not hold up to the stresses of the steering linkage moving, as if you were going to be moving the wheels alot. It's a static display model why would you? But you can see the location of the left side mounting screw- it's directly under the door hinge mount as you can see from the arrow. You cannot get a screwdriver in there. |
| |
|
|
| |
|
 |
| |
|
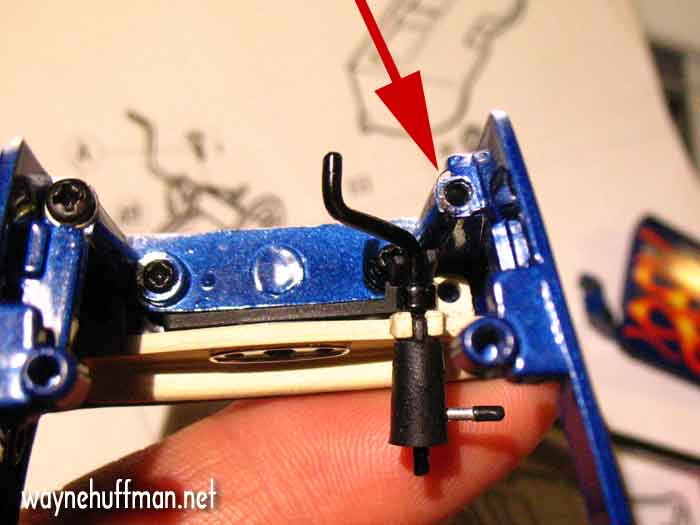
I removed the screw from the door hinge mount and moved it out of the way. On the left side of the picture you can see the hinge mount in place, the arrow on the right is the location of the screw after I removed it. If you do this you have to super glue the hinge mount after you screw it back down so it doesn't rotate when you opent the door. Otherwise the door won't shut correctly. |
| |
|
|
| |
|
 |
| |
|
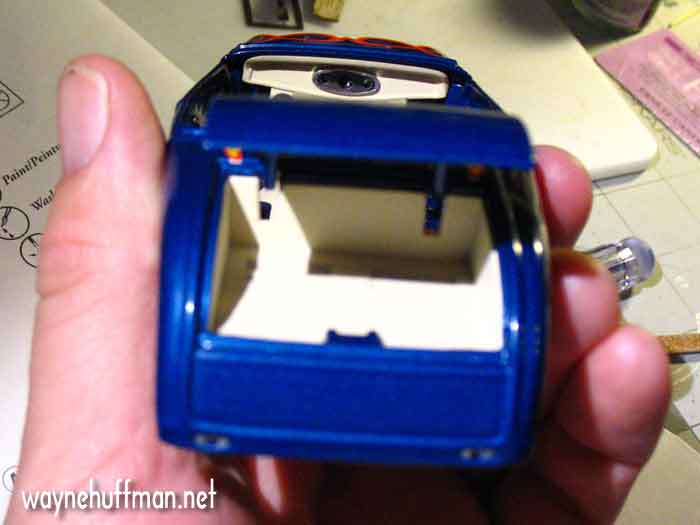
The dash is mounted, and the trunk insert is screwed in as well. |
| |
|
|
| |
|
 |
| |
|
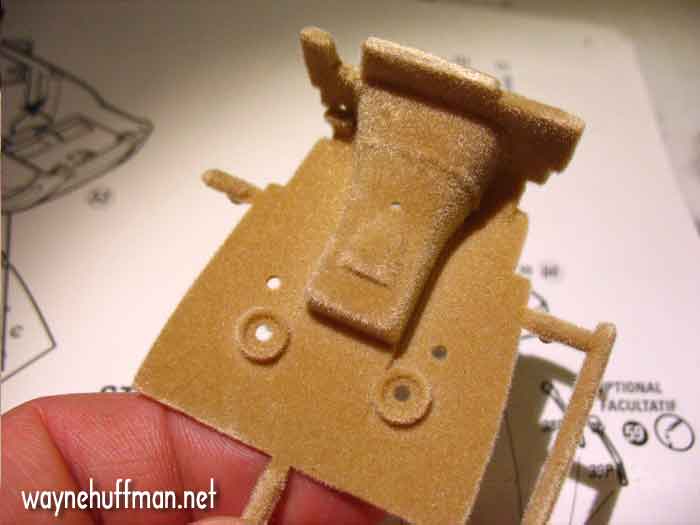
Here's the floorpan it's a piece of plastic that's been flocked to represent carpet. It's a nice touch and looks pretty close to scale carpet. The raised holes are where the seats will mount, the smaller holes will locate the body onto pins molded onto the chassis. |
| |
|
|
| |
|
|
| |
|
Next: Gluing the interior parts in |
| |
|
|
| |
|
|
| |
|
|
| |
|
|
| |
|
|
| |
|
|
| |
|
 NEWER NEWER |
Beginning of this build |
OLDER |
| |
|
|
|